Most microphone guides hand you a top ten list and expect you to figure out where you fit in. But that's not how it works. The best microphone for YouTube is all about one thing: where your mouth is in relation to the mic, and whether that distance changes during the shot.
Get that right and a mic that costs less than $100 sounds like a pro's. Get it wrong and a $400 mic sounds like a dodgy conference call. This guide flips the script on YouTube microphones by sorting them by recording situation, not just running down a list of the most popular models. It also gives you real-world costs, not just the headline price.
Where You Film Decides Which Mic You Need
You'd be surprised how many YouTube channels fall into four basic categories, and each one wipes out most of the options:
- You sit at a desk and the mic can be seen on camera. Tutorials, gaming commentaries, podcasts, voiceovers, reaction videos - you get the idea. For these, you want a USB or XLR dynamic mic on a boom arm. But wireless and shotgun mics are overkill in this scenario.
- You film with a camera from a fixed position, and the mic can't be seen. Talking head videos shot from two or three feet back in the frame. In this situation, you need a shotgun mic on the camera's hot shoe or a wireless lav.
- You move around while filming. Vlogs, walkthroughs, cooking shows, two-person interviews - in all these cases, you need wireless. And let me tell you, this is one area where you can save money by splurging - cheap gear will just fall apart.
- You film on your phone. Simple as it sounds, you need a wireless kit with a USB-C or Lightning receiver, or a mic that plugs directly into your phone.
Film in more than one situation? Buy the one that you do most often. The biggest mistake you can make in this whole category is buying one popular mic and expecting it to solve everything.
Best Microphones for YouTube at a Desk: A No-Nonsense Guide
Dynamic microphones are the way to go here, and its not because they're trendy, its because of the physics of them. A dynamic capsule ignores most of what's coming from the sides, so it hears less of the room, the keyboard, and the PC than a condenser does. In an untreated bedroom, that makes a huge difference.
Samson Q2U
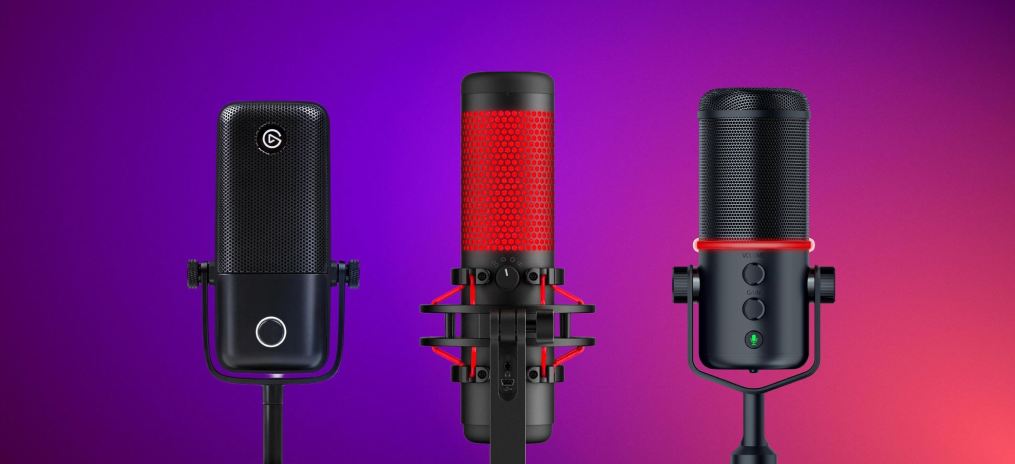
The honest starting point. It connects over both USB and XLR, uses a dynamic design that rejects room noise, and delivers clean, broadcast-quality sound for talking-head videos. And here's the kicker: you can plug it straight into your laptop today and still use it with a proper audio interface in two years, without buying a new mic. The Audio-Technica ATR2100x-USB does almost the same job if you can find it cheaper.
Rode PodMic
Sounds a bit fuller and richer than the Samson Q2U, but its only available with an XLR connection, so you'll need an interface to go with it. Paired with an entry-level interface, it gives you a better signal chain than an all-in-one mic. If you already own an interface or are willing to add one, this is the way to go.
Shure MV7+
If you want to buy once and never have to think about microphones again, this is the one to go for. It does USB-C and XLR at the same time, includes its own converter, and has onboard noise reduction and auto-leveling. Which, if you're a solo creator without a sound engineer, is exactly what you need. Worth noting that the original MV7 has been discontinued and replaced by the MV7+, so searching for "MV7" will bring up the new one. Shure's cheaper MV6 is a bit more stripped back but covers the same ground.
Elgato Wave:3
The condenser option that's worth mentioning, and a favorite among streamers. It's the strongest pure-USB option if you want simplicity plus genuinely good sound, and the Wave Link software is a useful tool when you're mixing your voice with game audio or music.
Just one thing to keep in mind: if you're planning on using this in a quiet room, it will sound great. If you're in a noisy environment, you might want to consider something else.
Shure SM7B
You've probably seen it in every studio photo on the internet. But for most YouTube creators, its a bit too expensive to be a good starting point.
It needs a lot of gain, often more than you can get from a typical interface. Which means you'll probably end up needing a CloudLifter or a high-gain interface, pushing the total system cost over $550. And let's be honest, in an imperfect room, a PodMic with a good interface is going to sound pretty close to the SM7B. So unless you've got a dedicated recording space and you just want to stop upgrading, its not the best place to start.
Best Microphones for Filming with a Camera
When you're filming with a camera and you don't want the mic in frame, the simplest solution is a shotgun mic on the hot shoe. Something like the Rode VideoMicro II is a great place to start. It mounts on any hot shoe, needs no batteries, and makes a huge difference compared to the built-in camera mic.
But get a real grip on what a shotgun mic actually does. Its got direction, but no magic. It blocks the sound coming from the sides and back, but don't think it's gonna wipe out the echo bouncing off the wall behind you, and it can't even fix the loss of clarity from sucking it up four feet back instead of sitting right there at eight inches.
Best Wireless Mics for Vlogs and Interviews - Don't Skimp
If you're buying cheap, you'll be throwing money in the bin. A dropout in the middle of a take, and that's it, the audio is gone - and no editing trick in the world can bring it back.
DJI Mic 3
Currently the top dog in the most popular creator system. The transmitter records its own internal 32-bit float audio on 32GB of storage, keeping you out of the clipping zone most of the time, even when you get the levels wrong, and it adds dynamic gain control to help out speakers who get loud and then quiet. You can record four channels at once with one receiver, and it connects up to four transmitters. Just be aware that it has no 3.5mm jack to hook up an external lavalier - that's a problem if you need to go for a hidden mic rather than a visible clip-on.
Rode Wireless Pro
If you need to have a lav input and a whole bunch of accessories, this is the go-to. The old Wireless GO II might still come up in roundups, and it does have one thing going for it: onboard recording with over 40 hours of built-in memory. Just check the price against newer systems before you plunk down the cash, because it's lost its value in recent times.
Hollyland Lark M2
This tiny magnetic package is seriously great for the sound it's packing, but it's also a good value for shoots that are all planned out. There are a few catches, though. There's no backup recording, and the magnetic mount is a bit dodgy on lightweight fabrics. Good for redoing bits that go wrong, but play it real cautious on that one-time interview.
DJI Mic Mini
This is the lightest, most budget-friendly option around, but watch out: the newer Mic Mini 2 came in at around $100, but it's not been certified for sale in the US. So just check on the availability in your area first.
Filming on a Phone? Read This First
Your phone's built-in mic is usually the weakest part of a mobile shoot, and it falls apart fast with distance. The fix is a small wireless kit with a receiver that matches your phone's port.
The Rode Wireless Micro was built for exactly this. Just know what was removed to hit the price: it's USB-only with no camera receiver option, and it has neither internal recording nor a 3.5mm input for lavalier mics. Fine for content you can reshoot. Not fine for paid work.
The Price Tag Isn't the Full Price
This is where first-time buyers lose money. Add up the whole chain before you order anything:
- USB dynamic mic: mic + boom arm + pop filter. Done. This is why USB dynamics dominate creator recommendations.
- XLR mic: mic + audio interface + XLR cable + boom arm, plus an inline preamp for low-output mics like the SM7B.
- Wireless kit: usually complete in the box, but check that your kit includes the receiver type your camera or phone needs. Manufacturers now split kits by connector.
- Shotgun mic: check whether your camera supplies plug-in power and whether the cable is included.
Your Room Matters More Than Your Mic
Two absolutley free adjustments will do more for your audio than any technical upgrade.
Move closer. Speaking six to eight inches from a dynamic mic instead of eighteen roughly doubles how much of your voice you capture relative to the room. Distance is the highest-leverage variable in home recording and it costs nothing. It's also exactly why wireless lavs sound so consistent: the mic stays a few inches from your mouth no matter where you walk.
Kill the reflections. Hard parallel surfaces are what make home recordings sound hollow. You don't need acoustic panels to start. Put a bed, sofa, curtains, or a full bookshelf between yourself and the nearest bare wall. Don't sit in the middle of an empty room. Lay something soft on the desk in front of the mic so sound doesn't bounce straight up into the capsule. A closet full of clothes is a genuinely excellent voiceover booth.
And remember: no mic removes echo that's already been recorded. Noise reduction software helps with steady hum and air conditioning, but it makes echoey rooms sound worse, because it's fighting the same frequencies as your voice.
What YouTube Does to Your Sound After Upload
What you record isn't what your viewers hear. YouTube re-encodes everything, and knowing the target settings saves you quality you'd otherwise lose in export.
YouTube's published upload recommendations specify AAC-LC or Opus audio in stereo, and the recommended sampling rate is 48 kHz, with 384 kbps commonly recommended for stereo. Set those in your editor instead of letting it default to 128 kbps, which noticeably thins out music-heavy edits.
Playback loudness gets normalized too. YouTube turns down videos mastered very loud so volume stays consistent as viewers move between videos. The platform doesn't publish an official target, but independent measurements consistently land near -14 LUFS. The practical takeaway: crushing your audio with heavy limiting to sound louder than everyone else doesn't work. YouTube reverses the loudness and you keep the damage.
Mistakes That Cost You More Than You Need To
Buying a condenser for a noisy room. That's just throwing good money after bad. If you are going to record in a space that's going to pick up on every noise, a dynamic mic right up close is going to sound better than a good condenser mic at arm's length.
Setting gain by eye. Please don't guess at your gain levels - record a quick test at both your normal volume and your loudest "I'm being interviewed" scream. If that loud take clips, it's time to turn the gain down a notch. Aim for peaks around -12 to -6 dB - that gives you some headroom without sending you into the noise floor.
Going wireless without a backup recording for stuff that you can't shoot again. If you're recording a one-off paid video, an event, or a one-time interview, you don't want to rely on the internal recording - that's a luxury.
Ignoring plosives. That big burst of air when you say 'p' or 'b' sounds is basically a dead giveaway that you're recording with a subpar mic. A pop filter costs less than 15 bucks, or you can just speak from the side a bit instead of right into the mic.
Skipping the sound check. Every time, just take five minutes to record thirty seconds, put on your headphones, and have a listen before you start filming. That's saved more videos than any gizmo ever will.
Conclusion
Your microphone is one of the few upgrades viewers notice immediately, but it only works when it fits how you film. Desk creator? A USB dynamic on a boom arm. Camera at a fixed distance? A shotgun mic, or a lav if your room echoes. Moving around? Wireless with backup recording, no exceptions.
And before you spend anything, try moving six inches closer and adding something soft to your room. Sometimes the best mic upgrade is the one you don't have to buy.